Tuesday, November 26, 2013

Thanksgiving Sides

We love green bean casserole around here, but sometimes it can get a little tired. And candied sweet potatoes are such a wonderful treat, but many bariatric patients just can't handle the high sugar content! So this week we've lightened up two of the most traditional side dishes for this holiday's feast! Find this week's episode here!

Green Bean Casserole

1 lb fresh green beans, washed, trimmed, and cut into bite-size pieces (about 1-1 1/2 in pieces)
1 onion, chopped
1 bell pepper, chopped (any color you like - we used red!)
1 package sliced mushrooms
2 T arrowroot
2 C chicken broth
1/2 C fried onions (optional)


Cut the green beans into smaller pieces (if you can't find fresh green beans, use frozen just thaw them first. In a REAL pinch, or if you don't like fresh green beans you can use two cans of green beans - just drain them first!)


Saute the onions, peppers, and mushrooms in some olive oil and butter (if you want to, add about 2 minced garlic cloves!)


Add the green beans to the pan and toss.


Add the broth and mix well.


Take 2 T of arrowroot ...


Combine it with about 2 T of broth to make a slurry. Add the slurry to the pan and stir well. Bring up to a boil then stir gently until thickened.


Pour into a greased casserole dish.

Bake at 350 for about 20-25 minutes.
If desired, top with french fried onions the last 5 minutes of cooking!


Sue hard at work in the prep kitchen!

The Sweet Potatoes

3-4 small-medium sweet potatoes, peeled, cut into 1-1 1/2 in pieces, and boiled until just fork tender
1/2 C brown sugar substitute (or more, if you want it!)
2 T cinnamon (or more, if you want it!)
1/2 stick butter, softened


Cut your sweet potatoes into smaller bits ...


And put them into a greased baking dish or casserole dish. 
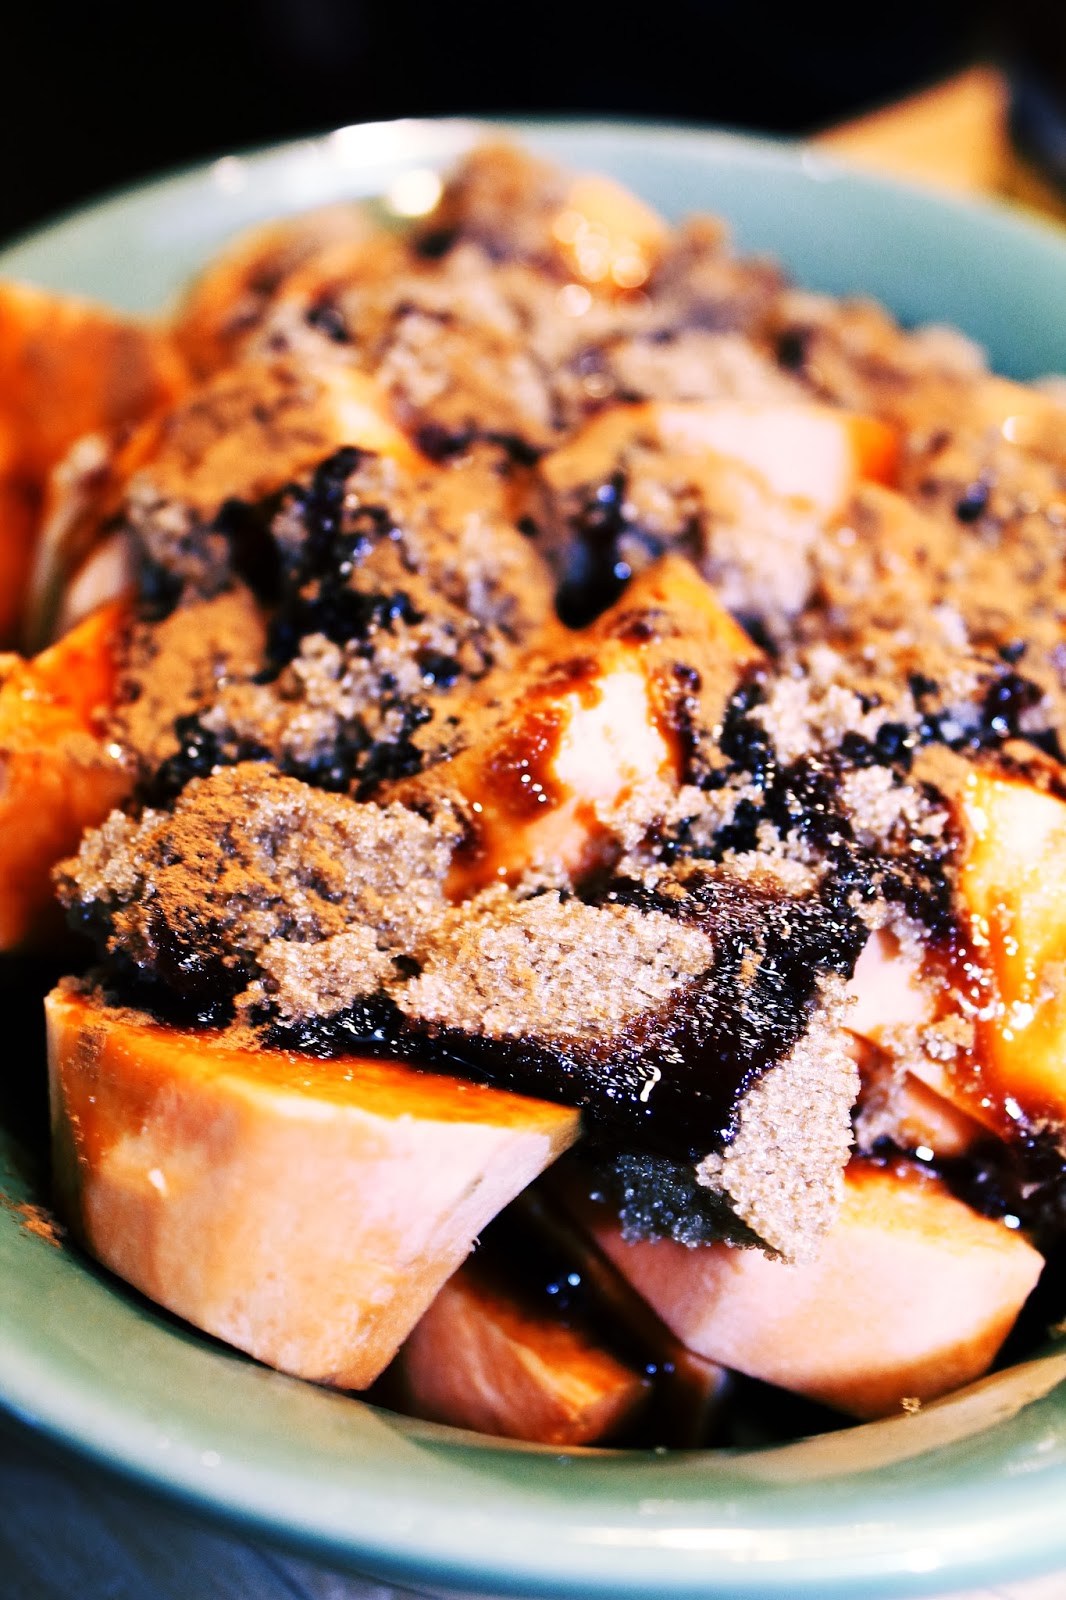

Add brown sugar and cinnamon. We also added some molasses here (2 T - just drizzle over the top!) Dot with butter and slide into a 350 degree oven.

Bake for about 30 minutes until they look kind of like this:

Then give them a stir.

Continue to bake for another 15-20 minutes until they look like this:


DONE!
Now, enjoy them while you look at your beautiful Thanksgiving table:


Yeah, I know. You've already seen it. We're just so proud of it!!

We are so THANKFUL for you - OUR VIEWERS!!
You guys are awesome and we are so glad you're joining us on this journey.
HAPPY THANKSGIVING FROM 7 BITES!!!

Love,


Jen and Sue


A 7 Bites Thanksgiving

Thanksgiving is the bane of a person that's had weight loss surgery. Weather you're brand new to the game and still on liquids or soft foods or you're an old hat, the fat, sugar, carbs, and portion sizes alone are overwhelming! This week, we've managed to lighten things up a bit lowering the fat and carbs by using a whole turkey breast rather than a whole bird, using a sugar free glaze instead of gravy, and making our dressing portion-controlled!


The Turkey
This is Hildegard. She made a wonderful main course this year!


 1 Whole Turkey Breast (find it in the poultry aisle alongside the other turkeys and the ham!)
1 stick butter, softened

1/4 C chopped fresh herbs (we used rosemary, thyme, and chives!)
Couple of teaspoons dried marjoram and/or savory


Wash turkey breast and pat dry. Set in roasting pan. 
Combine softened butter with herbs. Slather on turkey skin. Using your finger, gently separate the skin from the meat slightly and add more herb butter under the skin. 
Cover the bird with foil and roast at 325 for 2 hours, remove foil and finish cooking 30 minutes or until meat thermometer reads 155-160. Allow to rest for at least 10 minutes before carving - this will allow any carry-over cooking to finish and for the meats juices to redistribute.


Glazes:

Orange Glaze option                                                                        Apricot Glaze option

1 C orange juice                                                                             1 C apricot nectar
1 C orange marmalade                                                                    1 C apricot jam
2 T orange liqueur                                                                           2 T Amaretto liqueur

Combine all ingredients in a saucepan and heat over medium-low heat, stirring often, until reduced by half and thickened. Serve warm alongside meat of choice.


The Dressing

1 recipe Cornbread
1 onion, chopped
1 rib celery, chopped
1/2 C chopped pecans
1 T fresh rosemary
1 tsp of the following: Dried parsley, dried marjoam, dried thyme (you can add sage if you like it. We don't because Mom's allergic to it!!)
salt and pepper to taste
1 egg
1 C chicken broth


Cornbread:

1 C cornmeal
1 C flour
2 tsp baking powder


1 tsp salt
1 T sugar substitute (optional)


1 T melted butter
1 egg


3/4 C milk

Combine dry ingredients in large bowl. Whisk wet ingredients in smaller bowl. Add wet ingredients to dry ingredients and mix until well blended. Pour into sheet pan. Bake at 350 for 15-20 minutes or until toothpick comes out clean.
*NOTE* You can make this gluten free by substituting 1 C gluten-free baking mix for the flour OR by using all cornmeal!


Cut cornbread into cubes

Allow cornbread cubes to sit out overnight to dry OR dry in a 250 degree oven for about 2 hours


Chop one onion and a couple of ribs of celery and saute them in 1 T olive oil plus 1 T butter


Add to a large bowl with cornbread cubes and toss gently to combine.


Toss in some chopped pecans ...


Add 1 T chopped fresh rosemary
1 tsp ground marjoram
1 tsp thyme
1 tsp dried parsley
and toss to combine


Beat an egg into a cup of chicken broth and add to the bread cubes


*NOTE* I added WAY too much liquid and this is how it turned out. Yours will NOT be this loose!!!


Use a spoon to fill some greased mini muffin tins ...

You can also use individual-sized ramekins OR you can pour it into a 9X9 baking dish ...

Bake them up at 350 degrees:

Mini nuggets: 10-15 minutes
Individual ramekins:  20-25 minutes
9X9 baking dish:  30-35 minutes

Allow to cool for about 5 minutes before serving!


This is Pete. He's the official 7 Bites taste tester ...
Okay not really, but isn't he cute? Don't you just want to toss him some turkey?


Now set the table!


We found these dishes at the dollar store! Can you believe it?? Aren't they CUTE??

Happy Thanksgiving from 7 Bites!


Tuesday, November 12, 2013

Episode 6: Fall Favorites

The cooler weather is ripe for yummy comfort foods! These recipes are wonderful for fall and winter, and work well for every stage after surgery! Don't forget that if you're on full liquids or soft foods, you will probably want to puree them before eating!

PS: Sorry about the lack of pictures on the blog this week! We are changing formats with next week's episode - LOTS of pictures of both the finished product and the process! 


Jen's Fun Chili
Chili cook-off worthy! Texas red has no beans - if you MUST have them, serve pintos on the side! 

Serves 12 regular servings, up to 24 bariatric servings

2 lbs lean ground beef
1 medium onion, chopped
2 cloves garlic, minced
1 6 oz can tomato paste
1 28 can crushed tomatoes
12 oz good craft beer
1/4 C Chili powder
1 tsp ground black pepper
2 tsp salt, cumin, paprika, garlic powder, onion powder, oregano
1/2 tsp red pepper flake (or to taste)
1 T brown sugar substitute
2 tsp cinnamon

Stovetop directions:
Brown ground beef with onions and garlic until no longer pink and onions are tender. Add all remaining ingredients and mix well. Bring to a bubble over medium high heat, then turn to medium low and simmer for up to 2 1/2 hours, stirring occasionally. If it looks like the liquid is evaporating too quickly, add some broth or more beer (water will dilute the flavor!).

Slow cooker directions:
Brown ground beef with onions and garlic until no longer pink and onions are tender. Combine remaining ingredients in slow cooker and mix well to combine. Add meat mixture and stir well to combine. Cook on low up to 12 hours or on high up to 8 hours. If it looks like it needs more liquid after a few hours, add more beer or add some beef broth (water will dilute the flavor!)

Variations:
                 *Use allspice instead of cinnamon!
                 *Add 1/2 a block of Mexican chocolate!
                 *Add 1 chopped bell pepper.
                 *Use diced tomatoes instead of crushed tomatoes (2 cans)
                 *Toss some chipotles or some dried chilis in!

Nutrition per 1/2 C serving:
Calories: 186                Carbs: 13g                    Protein: 18g


*********************************************************************************


Mom's Beef Stew
Sometimes you just gotta have a potato!

2 lbs stew meat dredged in 1/2 C soy flour and seasoned with salt and pepper to taste
2 T oil
1 box beef broth
2 T tomato paste
2 medium red potatoes, peeled if desired and cut into bite size pieces
1/2 medium bag baby carrots
1/2 large onion, chopped
1 clove garlic
2 sprigs fresh rosemary
2 T "road kill seasoning" (garlic powder, salt and pepper)
1 C wine (red or white works!)

Stove top:
Brown dredged and seasoned stew meat in oil in large stock pot. De-glaze pan using 1 c beef broth. Add tomato paste and mix well. Add remaining broth and wine and stir well to combine. Add remaining ingredients and stir. Bring to a boil over medium high heat then reduce heat to medium low. Simmer for up to 2 hours, stirring occasionally. Add more broth if it looks as though the liquid is evaporating too quickly.

Slow Cooker:
Brown dredged and seasoned stew meat in oil. De-glaze pan with 1 C beef broth. Transfer to slow cooker and add remaining ingredients. Stir well to combine. Cook on low for up to 12 hours or on high for up to 8 hours. If it looks like the liquid is evaporating too quickly after a couple of hours, add more broth.

Variations:
                  *Add a handful of greens to the stew during the last 15-20 minutes for a great veggie boost!
                  * Use whatever veggies you have on hand! Green beans, scallions, turnips, sweet potatoes ...
                        any hardy vegetable works great!

Nutrition per 1/2 C serving:
Calories: 224                             Carbs: 9g                                     Protein: 17


Wednesday, October 30, 2013

Episode 4: Halloween Nuts!!

It's Halloween time! That means we want some TREATS!! But we don't want the to be tricky, and we certainly don't want them to trick US! So we concocted a couple of delicious treats that will melt in your mouth! 

Pecan Pie Bites

Filling:
1 C Honey
1 C Agave Nectar
6 Whole Eggs
1 C Sugar Substitute of choice (we used Sucralose)
2 C chopped pecans
2 tsp vanilla

Crust:
1 Stick Butter
2 1/4 C Almond Meal (Almond Flour)

For the crust:

Cut the butter into smaller pieces. Put it and the almond meal into the food processor and pulse until mixture resembles sand. Press into a 9 x 13 glass baking dish.

For the filling:

In a large bowl, combine eggs, honey, agave nectar, vanilla, and sugar substitute with whisk until well combined. Pour into crust and sprinkle pecans over the top. Bake at 325 for 40-45 minutes. Check by shaking the dish. If it doesn't jiggle, it's ready. If it still wiggles, leave in for 5 minutes at a time until done. Once done, allow to cool for 15-20 minutes to finish setting, then cut into 1 x 1 in pieces. You can wrap and freeze them in individual servings - just take them out about 30 minutes before you're going to indulge!


Spiced Nuts:

Nuts are a super yummy and healthy snack to keep on hand!


Cajun Spiced Nuts:

4 Cups Mixed Nuts (we used a combination of peanuts, almonds, pecans, walnuts, and pumpkin seeds)
1 egg white
1 T water
2 tsp Cajun seasoning OR 1/4 tsp sea salt, 1/4 tsp black pepper, 1/4 tsp garlic powered, 1/4 tsp cumin, 1/4 tsp chili powder, and 1/4 tsp cayenne pepper

In a bowl, combine egg white, water and seasoning until well combined. Put nuts and seasoning mix into a large (1 gallon) sized plastic storage bag and massage until well coated. Pour onto a parchment-lined baking sheet and flatten into a single layer. Bake at 325 for 30-40 minutes.


Cinnamon Spiced Nuts:

2 C Mixed Nuts (we used a combination of peanuts, almonds, pecans, walnuts, and pumpkin seeds)
1 T honey
1 T vegetable oil
1 T water
1/4 tsp cinnamon (or any sweet spice you like!)
2 T sugar substitute

Combine honey, oil, water, cinnamon and sugar substitute in a large (1 gallon sized) plastic storage bag. Add nuts and massage until well coated. Turn out onto parchment-lined baking sheet and flatten into a single layer. Bake at 325 for 30-40 minutes.

Tuesday, October 22, 2013

Episode 3: Cauliflower Power!!

Cauliflower is one of the most low-carb and versatile veggies out there.
It can stand alone or take the place of a higher-carb food like pasta or potatoes.
Delicious and nutritious, it packs a whopping 85% of your daily vitamin C requirements per cup, and also has calcium, magnesium, iron, and fiber. And, did you know that cauliflower even has some protein? Yep, that's right! 2 grams per cup. Not that that's a lot, but when you're counting protein, every gram counts! And let's not forget that carb count: 5 grams per cup! So what are you waiting for? Go try some cauliflower today! In fact, we even have a couple of recipes to get you started:


We added cheese and green onions to ours before baking.

Cauli-Tatos
Servings: 8 "Regular Size Tummies" (about 1/2 C) OR 16 Bariatric Servings (1/4 C)
I have three of the pickiest eaters on the planet, one of which is 17!! And HE will ask for this recipe by name, so I know it's a winner! It does contain some potatoes, though, so if you're REALLY watching that carb count, you can skip them altogether. It won't be quite as smooth, but it will still be delicious!

Cooking the Vegetables:
1 head of cauliflower cut into florets and washed
2 red potatoes, washed and cut into 1-1/2 inch pieces (you want them close to the same size as the cauliflower)

Cover with chicken stock and add about a teaspoon or so of salt. Bring to a boil over medium high heat, then reduce the heat and boil until potatoes and cauliflower are fork tender. Drain, leaving some of the cooking liquid (about 1/4 C) in the bottom of the pan. This will help keep the dish smooth.

Making the Cauli-Tatos

Add to your pan:
2-3 T Butter, softened
1/2 block of cream cheese, softened
salt and pepper to taste

Use an immersion blender to blend the goodies until almost smooth. If you don't have an immersion blender, toss it into the food processor and process until almost smooth. If you don't want chunks, process until completely smooth.

Transfer mixture to a greased 9X9 baking pan. Bake at 350 for 15-20 degrees until hot and browned on top.


Nutritional Information per 1/4 C:
Calories:  75
Carbs:     7g
Protein:   2g

*********************************************************************************


Cauli-Mac-And-Cheese
Servings: 8 "Regular Size Tummies" (1/2 C) or 16 Bariatric Servings (1/4 C)

One of our biggest cravings is PASTA. Although we CAN eat it (in small portions), it's not great for weight loss. My comfort food of choice is often homemade mac and cheese. It is just so good. This is such a great option to avoid the high carbs in the macaroni portion of that dish! You really don't miss the pasta!!


For the cauliflower:
1 head cauliflower, cut into florets

Cover cauliflower with chicken stock and add about a teaspoon of salt. Bring to a boil over medium high heat, then reduce the heat to medium and continue to boil until fork tender. Drain completely.

For the sauce:
1 1/2 C heavy cream
4 oz cream cheese
2 C shredded cheese of choice
3 tsp. brown mustard
1/8 tsp. garlic powder
1/4 tsp. salt
1/4 tsp. pepper
1/4 tsp. cayenne

Heat in a medium sauce pan over medium heat stirring consistently until smooth.
Add to cooked cauliflower and mix well,  then turn out into a greased 9X9 pan. Top with another 1/2 C cheese. Bake at 350 15-20 minutes or until hot, bubbly, and browned.


Nutrition per 1/4 C serving:

Calories: 130
Carbs:       3g
Protein:      6g

Tuesday, October 15, 2013

Episode 2: Something for Everyone! Meatloaf Bites! Plus, BONUS RECIPE!

Our second episode is up and running!! Thank you so much to everyone that has watched and subscribed to our channel. We are so thankful for your support!!


Protein is so important to people that have had any kind of weight loss surgery, especially in the weight loss phase! Did you know that the leaner the protein, the higher the protein count? It's true! We found that 1 oz of chicken breast has more protein than 1 oz of chicken thigh! The same goes for 1 oz of lean (90/10) ground beef vs. a fatter version (80/20). You can look it up for yourself by checking an online food database like Spark People or My Fitness Pal.

One issue with getting enough protein in for some of us is that our families don't want to have to eat what we do sometimes. There are some foods that are just difficult to make in smaller portions, and families don't necessarily want a mouthful of protein powder (okay, who does, really?). Recipes that are naturally smaller portions but full of protein are just what the doctor ordered in this instance!

This week's recipe is so easy, and surprisingly quick, and extremely versatile! Omit the ketchup and steak sauce, add some tomato sauce and Parmesan cheese for Italian meatballs! Switch out ground pork or chicken for the beef, add some soy sauce, green onions, and a pinch of Chinese 5 spice seasoning for Asian-style!


Mini Meatloaf Bites

1 lb lean (90/10 or leaner) ground beef
1 egg

1 C Ketchup
2 T Steak Sauce


Preheat oven to 425 degrees.
In a small bowl combine ketchup and steak sauce. Set aside.
In a larger bowl, combine meat, egg, and 1/2 of the ketchup/steak sauce mixture. Mix with your hands gently until well combined.
Using a cookie scoop, scoop into mini muffin tin.
Add one or two teaspoons of glaze to top of each mini muffins.
Bake in preheated oven 15-20 minutes until done (155-160 degrees with a meat thermometer).
Allow to rest for 10-15 minutes.
ENJOY!!


BONUS RECIPE!!
Since filming this episode, we've made the transition to more all-natural home made things - including condiments! We've found this amazing ketchup recipe that you can use in place of the one above. For the glaze, add a tablespoon of Worcestershire sauce and a teaspoon of yellow or Dijon mustard in place of the steak sauce!

Natural Ketchup

8 oz tomato sauce
6 oz tomato paste

2 T Vinegar of choice (I love balsamic or white wine for this!!)
1/4 C stevia or other natural sweetener of choice (I prefer honey, but it has a LOT of calories!!)
1/4 tsp. paprika
salt and pepper to taste (start with a pinch! - tomatoes and vinegar are naturally salty foods!)

Combine everything in a bowl and store in the fridge for a couple of weeks (if it lasts that long!!)

*NOTE*
 I meant to have pictures up on the blog for these recipes, but it did not work out that way this week! I will be taking shots soon and promise to have them posted as soon as possible! Bear with us!
<3 Jen <3


Tuesday, October 8, 2013

Episode 1: Preventing Yuck-In-A-Cup!!

Welcome to our blog! We hope you enjoyed our first episode! If you haven't seen it yet, go check it out here!

Today's show was all about the first few weeks after your weight loss surgery. I remember after my surgery, I was lost - completely LOST! I was given a small packet of papers on what I could and could not eat, but was told nothing about how to make it enjoyable. One of the largest downfalls of any weight loss venture is boredom!  So here are a few ways to prevent that boredom!

Phase one: Liquid diet before surgery:

Many of us are on a liquid diet before surgery. For some, we bought packets from the doctor's office. Others were on their own. If that's the case, shop around for a protein powder you like prior to starting this phase. Many health and nutrition stores will sell samples to you at a low cost, and some will even give them away! Be mindful though, what you like and tolerate prior to surgery will likely change AFTER surgery, so it's a good idea to only buy what you need for this phase!

Phase two: Clear Liquids After Surgery:

Some of us are on clear liquids for longer than others. What is a clear liquid diet? Well, bascally anything that is clear, not creamy, and not cream or dairy based. Some things you might be allowed on clear liquids are:
tea, coffee (black), water, fruit juice (diluted and 100%), water flavorings, gelatin desserts, broths, etc.

For those of us that were blessed to be on this phase for less than 24 hours, it's easy to get through. But for those that have to be on it for a week or more, it can become tedious! One way to get through this stage is by using herbs. Steep your fresh herbs whole (like you would tea) in your clear broths, then remove them. There are also now flavored broths on the market, so be sure to check those out as a viable alternative as well!

Phase three: Full Liquids After Surgery:

This is the one that we all have the hardest time with. How do we get our protein (60-80 grams!!!) on this phase?? Let's face it, most protein powders are NOT GOOD (yuck-in-a-cup!!!!).

First off, DON'T PANIC!!!

Second, remember that on full liquids, anything you can puree into a liquid consistency is fair game. That means ANYTHING - toss something into a blender with some broth until you can drink it and away we go!! (Did that with sardines once ... yeah ... don't ever do that) This works great for soups and stews - make a favorite soup or stew, then add a little extra broth when you puree it! Canned cream soups are okay in a pinch - but be sure you strain out any solids!

For those pesky protein shakes, don't forget you can add FLAVORS!!! Not only can you use flavored extracts and syrups (a favorite combo of mine was chocolate and mint! YUM!) but you can also use spices to flavor any of them! Try some pumpkin pie spice, or (another favorite) add some vanilla extract, cinnamon, and allspice for a snickerdoodle flavored shake! So many combinations - that's a future blog post on it's own for sure!

Phase four: Soft Foods After Surgery

I remember my first day on soft foods. I had refried beans and I about cried they tasted so good!! When soft foods come into play, you can be a bit more creative with what you make. One of my absolute favorite go-to's was a version of shrimp and grits that I still love:

Phase Four Shrimp and Grits
Servings: one (with leftovers!)

1 Packet Instant grits prepared according to package directions (use broth instead of water for a flavor boost!) - DO NOT HEAT YET!!
2 T cream of shrimp soup

In a microwave safe bowl, combine grits, broth, and soups. Consistancy should resemble loose mashed potatoes. Heat on high for 30 seconds. Stir. If needed, add more broth or soup to loosen to keep consistancy. If not heated all the way through, continue to heat in 10 second increments until hot.

Once you're on full solids, you can add some REAL shrimp to this and it is DIVINE!!

After this phase, you will start transitioning into full solids. Protein bars are an easy thing to keep on hand for those "rushed" moments, but remember you are better off by getting your protein in with REAL food at this point. Great things to keep on hand just for that use are:
canned tuna, canned chicken, canned beans (also helpful with fiber!!), jerky (after the first two months), deli meats, cheese, boiled shrimp, hard boiled eggs, nuts, etc ... Again, the list is so vast, it's a blog post on it's own!

Thank you so much for coming to visit our kitchen! Next week we will actually be cooking, so be sure to get your aprons ready! We can't wait to share our recipes with you!